Building Your Own Pickleball Court: A Step-by-Step Guide
- Team Pickleball
Welcome to ‘Building Your Own Pickleball Court: A Step-by-Step Guide’—your ultimate resource for transforming your yard into a pickleball paradise! Whether you’re a seasoned player or new to the game, this comprehensive guide will walk you through every stage of creating your own pickleball haven. Additionally, from selecting the perfect location to adding the finishing touches, join us on this exciting journey to craft the ultimate pickleball court tailored to your needs and preferences. So, let’s embark on this adventure together and turn your dream of having your own pickleball court into a reality!

Step 1: Choose the Right Location for Building Your Own Pickleball Court
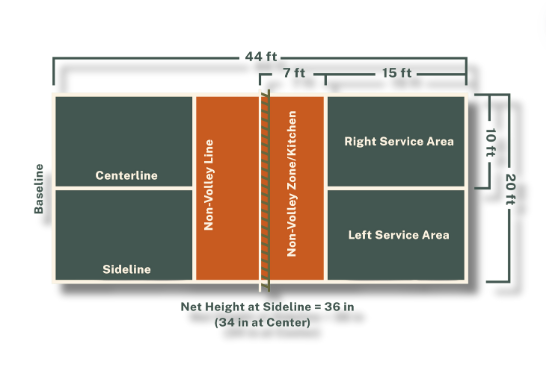
The first thing to remember in building your own Pickleball Court is choosing the perfect location. Look for a flat, level area in your yard that is large enough to accommodate a standard pickleball court, which measures 20 feet wide and 44 feet long. Check for obstructions such as trees or utility lines overhead, and consider factors like sunlight exposure and proximity to neighbors.
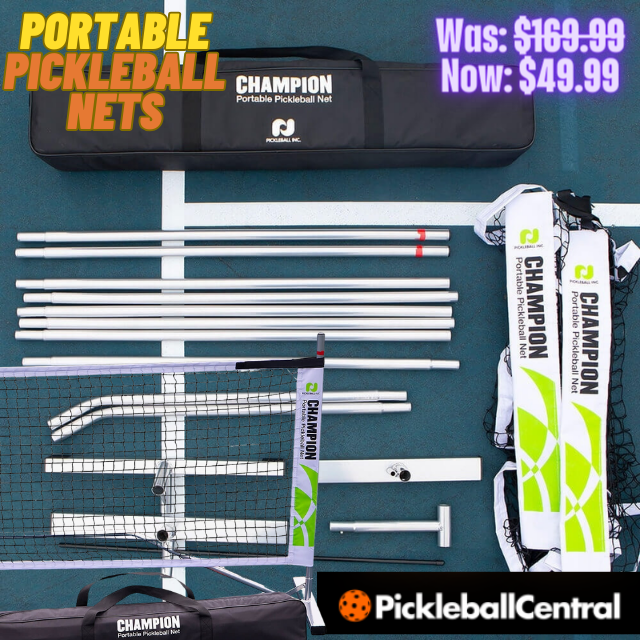
Once you’ve selected the location, it’s time to gather your materials. For this step, you’ll need the following items: outdoor paint or tape for marking the court boundaries, concrete or asphalt for the playing surface, posts and pickleball net for the centerline, and measuring tape and chalk for marking out the court dimensions. Additionally, as an option, consider installing fencing or barriers to enclose the court. These additions can not only define your court’s boundaries but also enhance safety and aesthetics.
Step 3: Mark Out the Court Dimensions
Use your measuring tape and chalk, mark out the dimensions of the pickleball court on the ground. A standard court is 20 feet wide and 44 feet long, with a 7-foot non-volley zone (also known as the “kitchen”) on either side of the net.
Step 4: Prepare the Playing Surface
After the court dimensions are marked out, it’s time to prepare the playing surface. Whether you’re using concrete or asphalt, make sure the surface is smooth and free of any cracks or debris. Also If possible, consider hiring a professional to pour and level the concrete on building your own pickleball court.
Step 5: Adding Court Accessories
To enhance your pickleball court, consider adding additional pickleball accessories such as permanent or portable posts to hold the pickleball net in place, seating for players and spectators, and lighting for evening play. Moreover, these additions can enhance the playing experience and make your court more functional and enjoyable.
Step 6: Paint or Tape the Court Boundaries
Apply outdoor paint or tape the boundaries of the pickleball court on the playing surface. Be sure to follow the dimensions you marked out earlier and use contrasting colors so boundaries are clearly defined.
 Step 7: Add Finishing Touches for Building Your Own Pickleball Court
It’s time to add those finishing touches that will take your pickleball court to the next level. You might consider installing some comfortable benches or seating areas for players to rest during breaks. So, If you plan to play in the evenings, adding some lighting will allow you to play well into the night. Additionally, you could plant some beautiful landscaping around the court to create a more pleasant environment and enhance the overall appearance of your court.
Ensure that the pickleball court layout adheres to the USA Pickleball Association’s guidelines so that regulatory standards are met.
Conclusion from Building Your Own Pickleball Court
Congratulations! At this point, you’ve now successfully building your own pickleball court! With your new court in place, you’ll be able to enjoy endless hours of fun, not only that, you will have a competitive play with family and friends. Additionally, Pickleball is a great exercise and a sport for all ages. So grab your pickleball paddles and get ready to serve up some excitement on your new pickleball court!
If you would like us to feature your brand in our upcoming Pickleball blogs, Collaborate with Us. We’d love to have you featured.


